2017年12月27日水曜日

高麗組または重打 Koraigumi or Shigeuchi AB or DC


ワークショップでは、仕上がりの綺麗さに目がくらんでいましたが、組んだ高麗組をよく見ると、どこかで見たような。そう、クテ打ちの基本動作で取り上げるのを忘れているABとよく似ています。という訳で、今日は、基本動作ABとDCをします。

重打(しげうち)と呼ばれる組み方です。外回し(AB)でも中通し(CD)でもできます。角組の厚さを半分にして横に平に広げたような形です。ループ数が少ない場合は平らになりますが、ループ数が10本を越えると、紐は平らではなく、ABの場合は右手側に、CDの場合は左手側に、内側に丸くなりますが、これを指でしごいて平にします。

写真の3本の紐の初期配置は以下のとおりです。

黄赤緑 AB & DC 4-4        ①①②②  ③③③③

紫系 DC 7-6     ①① ②②③③④  ④④④④④④ 
        ④④④④④④④  ④④④④④④
  
ピンク系 AB 7-6 ①①②②③③④  ④④④④④④  

一番上の黄赤緑の紐は、最初はABで、途中からDCに変えて組んでいます。V字の向きが上下逆になっているのが分かりますか。


At the Workshop, I was so impressed by the beautiful finish of the work that I did not notice that I had seen this braiding before.  It looks very similar to Shigeuchi!  Today we learn Shigeuchi, AB and DC.

We can do this either AB or CD.  The braid looks to have a half the thickness and a double width of Kakugumi.  When you work with a small number of loops, the braid is flat, but with over 10 loops, the braid is inwardly curled on the right hand side for AB, and on the left hand side for CD.  You need to knead the braid with fingers to make it flat.

The initial color settings for the 3 braids above are as follows:

Yellow-Red-Green AB & DC 4-4 ①①②②  ③③③③

Purples DC 7-6 ①① ②②③③④  ④④④④④④ 
           ④④④④④④④  ④④④④④④

Pinks AB 7-6     ①①②②③③④    ④④④④④④

I started with AB for the top braid, and changed in the middle to DC.  You will notice the V-fell up-side-down.

2017年12月11日月曜日

組紐・組物学会ワークショップ The Kumihimo Society Workshop


組紐・組物学会のワークショップ「ディスクで高麗組」に参加しました。私が受け取った材料は、かなりしっかり撚った絹糸4本と金色のメタル糸2本、大小の金色ボタン各1個です。3種類の動作で1サイクルという比較的簡単な組み方ですが、でき上がったものはとても豪華です。

いつもゆるい撚りのコットンキングで組んでいるので、まず、絹の光沢に感激。そして強い撚りの糸は立体的に組み上がるように思います。それにメタリックゴールドが加わると、金色のボタンと引き立て合って、豪華絢爛です。

途中で操作を誤って、色の順序が狂ってきたので、解いてやり直そうとしたのですが、闇雲に解いて訳が分からなくなってしまいました。思い切って先生にお願いすると、さっさっさっと糸を操って、元の状態に戻して下さいました。「解く時は、組む時と同じように1動作ずつ逆に戻って下さい」と、優しいお言葉。今日の教訓は、「急がば回れ」でした。 


ワークショップのもうひとつの楽しみは、参加者からいろいろ教えていただけること。皆さん、さりげなく組紐のメガネチェーンや、ペンダント、ブレスレットを身につけておられます。それらを見せて頂くだけでも、はるばる京都まで来たかいがあったというもの。それに、今日は、ディスクを手で持たなくても両手で糸を操作できるように工夫した台も拝見したし、隣の席に座っていた生徒さんは、昇苑という組紐の材料やできあがった物を販売しているお店の方で、楽しいお話も聞けました。


Attended The Kumihimo Society’s workshop “Koraigumi using a kumihimo disc” in Kyoto.  At the entrance I received a set of material; 4 hard twist silk threads, 2 metal threads and a big and a small golden buttons.  It was a rather easy kumihimo with three movements as one cycle.  The finished work, however, is just gorgeous. 

First of all, I was impressed by the silk glazing since I am so much used to Cotton King.  Besides strong twist threads seem to make more stereoscopic braids.  Then metallic gold threads look so superb with golden buttons. 


While braiding, I made a mistake and got mixed up with the color order.  I undid it and tried to start again.  But I got lost.  I daringly asked the teacher for help.  She manipulated threads one by one and corrected the whole mess.  She said, “When you undo, do it in the reverse order one by one.”  She was so efficient and gentle.  My lesson today is “the longest way around is the shortest way home”.


Another joy of attending a workshop is that you can learn a lot from attendants.  Everyone is wearing kumihimo glass chains, pendants, and bracelets.  It is worth traveling all the way to Kyoto just to look at their works.  Today I also saw a special hand-made supporting stand for a disc enabling to operate with both hands.  An attendant next to me worked for a shop Shoen where they make and sell kumihimo and materials.  We had an interesting talk.

2017年11月22日水曜日

源氏打 BBCCとにせ源氏打 BBDD

くて打ち4つの基本動作A、B、C、Dの組み合わせの最後は、BBDDです。しっかりとして、断面がほぼ円形の紐です。
「クテ打組紐技法入門」シリーズから1例です。

6-6 ①②①②①②  ②①②①②①
         ②①②①②①  ①②①②①②


これは私のお気に入りで、カメラのストラップやらいろいろに使っています。写真ではうずまきの中からBBCCで始めて、半分位からBBDDに変えました。お見せしにくいのですが、裏と表で、同じ模様がポジとネガになっています。

The last combination of Kuteuchi Basic Movements A, B, C, D is BBDD.  This is the example from “Introduction to Kute-uchi Kumihimo Technique”.

6-6 ①②①②①②  ②①②①②①
         ②①②①②①  ①②①②①②


This is one of my favorites.  I made a camera strap and others with BBCC.  In the photo, from the center I started with BBCC and changed in the middle to BBDD.  Though it is hard to see, the same pattern appears on the back and in the front of the braid, but in the opposite colors forming negative-positive contrast.


2017年11月7日火曜日

平組 AADC

幅の広い紐を組みます。AADCです。AADDと比較するために、ほぼ同じ色の配置でやってみます。


4回目にひねるか、ひねらないか、でこんなに違った結果になるのですね。AADDと比べると、幅が広い分、厚みはそれほどありません。配色は次の通りです。8-7とあるのは、ループの数が左手8本、右手7本の意味です。

赤系4色 8-7 ④④①①①①②②  ④④③③③②②
紫系7色 8-7 ⑦①①②②③③③  ⑦⑥⑥⑤⑤④④
赤緑黄 8-7  ②①②①②①②①  ③③③③③③③

グレーピンク白  山道 8-7  ②①②①②①②③  ①③①③①③①
                                                   ①①①①①①①①  ①①①①①①①

上3本はすべて単色ループですが、4本目の白グレーピンクは、2色ループと単色ループの両方を使っています。 実は全く違ったものを想定していたのですが、結果はこうなりました。嬉しい誤算です。2色ループは、「閉」で上下の色が変わるので、私の頭で考えた通りには行かない点が、面白くもあり、憎らしいところです。「山道」という名前も素敵ですね。

We try a wide braid AADC today.  To compare the difference from AADD, I used almost the same color threads.


It is amazing.  We get a completely different pattern by changing the 4th movement from “D: cross” to “C: open”.  The finished braid is wider than AADD and therefore thinner.  The color arrangements are as follows: 

4 reddish colors 8-7   ④④①①①①②②  ④④③③③②②

7 purplish colors 8-7     ⑦①①②②③③③  ⑦⑥⑥⑤⑤④④

Red,Yellow,Green 8-7     ②①②①②①②①  ③③③③③③③

Grey,Pink,White, Mountain Path 8-7 ②①②①②①②③  ①③①③①③①
                                                               ①①①①①①①①  ①①①①①①①

The top 3 braids are made with single-color loops, and the forth with single- and bi-color loops.  In fact, I planed to make a completely different pattern, but got this.  It was a nice surprise!  For me, bi-color loops are difficult to foresee the results because they change colors each time loops are twisted, which is interesting and troublesome.  The pattern name, “Mountain Path” is beautiful.

8-7 means 8 loops in the left hand, 7 loops in the right hand. 

2017年11月1日水曜日

修多羅(しゅたら) Sutra

京都国立博物館の国宝展へ行ってきました。お目当ての法隆寺の四騎獅子狩文錦もじっくりと拝見でき、1度訪れたいと思っていた清涼寺の釈迦如来像も拝見できました。あちこち出かけなくても、立派な仏像や絵画が一堂に集められているのは嬉しいことです。組紐関係では、神照寺の宝相華唐草文透彫華籠はありましたが、予想通り、肝心の紐ははずしてあり、見ることはできませんでした。

教王護国寺(東寺)から七条綴織袈裟と横被が出展されていました。その横被に修多羅というものがついていました。よく似たものを見たことがあると思ったのは、聖徳太子1390年御聖諱法要で、正装したお坊様が肩から後ろに垂れ下げておられたものでした。


東寺のは、緑赤黄紺の4色の組紐です。横被は9世紀の唐から来たものだそうで、修多羅も当時のものなのか、確認するのを忘れました。

帰ってから、「修多羅」をインターネットで調べてみると、元のサンスクリット語は、スートラ sutraで、元々は糸、織物の経糸を意味したものが、経典を意味するようになったそうです。スートラを中国語に翻訳するときに、音訳したのが「修多羅」、意訳したのが「経」です。

糸を意味するスートラが、経典を意味するようになったのは、スートラが、経糸のごとく過去・現在・未来を貫く不変のものであり、それに対して様々な格言や規則、思想、理論などが緯糸として織り込まれ、織物全体が人間の偉大な知恵を形成するものだから、なのかなと、私なりに理解しました。

「お経」は経糸だったのだ!と初めて知りました。仏教に興味はあったのですが、急に自分の趣味である織物や糸、紐に近い話になって驚きました。そう言えば、前から思っていたのですが、英語のTEXTとTEXTILEはどこかで繋がっているのではないか。その答えが、この辺にあるような気がします。

ともかく、漢字の修多羅が経と一緒に日本に来て、経典以外に、僧侶の袈裟の装飾品を示すようになったのは、なぜでしょうか。恐らく、元の意味の「糸」を使ったものだからではないでしょうか。


国宝をたくさん見て興奮し、新しい言葉「修多羅」を覚えて、さらに興奮しました。


One day in October, I went to the Kyoto National Museum to see the National Treasure Exhibition.  Among others, there was a priest’s garment decoration called “sutra 修多羅”.  It is a complicated knotted kumihimo.  The photo is a priest with a sutra attending a big memorial service.


I looked up the word 修多羅 on internet and learned that 修多羅 is the transliteration of the Sanskrit word “sutra” into Chinese whereas more familiar word 経 is the free translation of the same word.  I also learned that “sutra” meant in ancient India a thread, string or warp. 


How did the word meaning thread come to mean sutra?  It is explained in many ways, most of which are very interesting and complicated.  As far as I understood, sutra (warp) is an eternalness piercing through past, present and future, while various aphorisms, rules, thoughts and logics are woven as a weft.  The whole textile is the accumulated wisdom of mankind.


So the sutra was a warp!  I have been interested in Buddhism, and I was amazed because the topic suddenly turned into something familiar to me, like thread, weaving, and string!  It reminds me that for some time I have been wondering that Text and Textile should be somehow related.  The answer might be hidden in this story of sutra.


Then why did sutra come to mean a garment decoration for a priest?  Perhaps it is made with a kumihimo, threads, the original meaning of sutra.


It was an extremely inspiring day in Kyoto.

2017年10月24日火曜日

源氏打ち Genjiuchi BBCC

「クテ打組紐技法入門」シリーズから源氏打ちBBCCを取り上げます。初期の配色設定は以下の通りです。
(ア)  ①②①②①② ②①②①②①
             左手       右手

左右対称です。これを非対称にすると、

(イ)   ①②①②①② ①②①②①②

がらりと変わります。紐は丸みを帯びていますが、ループ数が偶数なので、右手側面がやや広く、左手側面はそれよりは狭くなっています。巾着の紐などにちょうどいいですね。

真の一番上の茶と黄色の紐は、途中で(ア)から(イ)に変え、また(ア)に戻りました。ループの配置を変える時は、1度に変えるのではなく、組みながら順に変えていった方が、仕上がりに無理がなく滑らかになります。


3色でやってみました。
(ウ)   ①①①①①① ②③②③②③  

 
(エ)   ①①①①①① ③②③②③②


写真2番目の緑、ピンク、グレーの紐は、最初は(ウ)で②のグレーが右側面に来ました。(エ)にすると、③のピンクが右側面に来ました。


次は4色です。
(オ) ①②①②①② ③④③④③④


(カ) ①②①②①② ④③④③④③


左右の側面には左右同じ色(単色)の矢羽根ができ、上下の面には左右異なる色の矢羽根ができます。これを全て単色の矢羽根にできないかと考えたのが一番下です。

(キ) ①②①②①② ③①③①③①
    ④②④②④② ③④③④③④


① と④の2色ループを6本、単色ループ②と③をそれぞれ3本ずつ使っています。


応用作品です。紬の着物地でスカーフを作りました。スカーフが滑ってこないように、源氏打ちの紐を肩の辺りに縫い付けました。
 (ク) ①①①②①①  ②①①①③①

いつもはコットンキングを使っていますが、この時は幡垂飾を組んだ残りのハマナカのアプリコを使いました。ベージュは金ラメ入りです。

We try Genjiuchi BBCC from the book “Introduction to Kute-uchi Kumihimo Technique”.  The initial color arrangements are as follows.

A)  ①②①②①② ②①②①②①
    Left       Right

Bilaterally symmetric.  We can change it slightly like this.
   
B)   ①②①②①② ①②①②①②

The pattern changes dramatically.  The braid is round, but since the number of the loops is even, right hand side is a little wider than the left hand side.  The braid is ideal for drawstring purses.

To make the top brown and yellow braid, first I did A) then B) and back to A) again.  When you change loop positions, I recommend that you change loop positions one by one as you braid, rather than you change all the loops at once.  That way, the finished braid looks better.


The second one in green, pink and grey started like this.
C)      ①①①①①① ②③②③②③   
D)      ①①①①①① ③②③②③②

The grey② came to the right hand side when I started C), and the pink③ came to the right hand side when I changed to D).

Then four colors.
E)    ①②①②①② ③④③④③④
F) ①②①②①② ④③④③④③

On both sides we have two single-color chevrons alternately, and on top and bottom we have chevrons with different colors on right and left.  I wanted to have 4 single-color chevrons and came up with the following:

G) ①②①②①② ③①③①③①
  ④②④②④② ③④③④③④

I used 6 bi-color (① and ④) loops, and 3 single-color loops in ② and ③ each.


Here is a scarf I made with kimono material.  I attached a BBCC braid at around the shoulder so that the scarf does not slip down.

H) ①①①②①①  ②①①①③①

Though I usually use Cotton King, this time I used Aprico from Hamanaka that I bought to make Bansuishoku in April.

2017年10月13日金曜日

正倉院の大幡  Ritual Banner in Shosoin


秋は展覧会の季節です。奈良では毎年、正倉院展が開かれます。昨年は組紐で飾られた大幡が出品されたので、勇んで出かけました。全長458cm幅90の大幡がガラスケースの中に横たわっていました。まさしく威風堂々でした。ケースの上からじっくり見せて頂きました。本当は、幡をひっくり返して、裏側も見たかったです。かなり痛んだ部分もあって、白糸で抑えてありました。本体の幡身が青や赤のアップリケで目を引くものですから、組紐の部分もきっと鮮やかな色だったに違いありません。撚りの強い糸を使った一間組でした。奈良国立博物館の清水健氏の「正倉院の荘厳具-大幡に寄せて-」という講演も拝聴しました。その時のお話が大変興味深かったので、紹介します。

幡とは、古代インドが起源で、中国、朝鮮半島を経て日本に伝来した、仏教荘厳に欠かせない仏具でした。日本への仏教の公式な伝来は552年とされていますが、この時百済の聖明王が日本に贈ったのは、日本書紀によると、「釈迦仏金銅像一体 幡蓋若干 経論若干巻」だったそうです。金剛像を見た欽明天皇(聖徳太子のおじいさん)は、大層心惹かれたそうです。金剛像とお経の巻物と、その他の仏具とは聞いていましたが、その仏具というのが幡蓋だったことを今回初めて知りました。想像ですが、欽明天皇は、光り輝く金剛像もさることながら、はためく色鮮やかな幡にも心躍る気持ちになられたのではないでしょうか。幡というのは、お祭りの時などもそうですが、風にはためいて、人の心を高揚させます。


写真は2011年に法隆寺で行われた聖徳太子1390年御聖諱法要で使われた現代の幡です。法隆寺にはもっとすごい金銅製の潅頂幡が伝わっており、これを復元したものを東京上野の法隆寺宝物館で見ることができます。

正倉院の大幡は、757年5月2日に東大寺で行われた聖武天皇一周忌斎会の時に用いられたそうです。この法要には1500人の僧侶が参列し、大変盛大なものだったそうです。大幡も少なくとも10本、それより小ぶりの道場幡は600本以上並んでいたそうです。大幡は今残っているのは4メートル余りですが、元は幡脚も入れると15メートルにもなったそうですから、それが10本以上並ぶと圧巻だったに違いありません。しかも、1周忌斎会は奈良の都だけではなく、地方26か国の国分寺国分尼寺でも行われたそうで、そのために丈六の仏像がまだできていない所は急いで完成させよとのお触れが前年の6月3日に出ています。そして12月20日には、潅頂幡1と道場幡29首のセットが既に26か国に送られました。聖武天皇が亡くなって1年の間に一周忌の準備は都と地方において着々と進められ、当日はそれはそれは見事に華やかな法要が営まれたのでした。


大幡を作る職人さんたちはきっと、気合を入れて頑張ったことでしょう。地方へ送る26本は12月までに、東大寺で使う10本以上は翌年6月2日までに仕上げなければなりません。錦や綾などの豪華な材料を集め、色を吟味して、手分けして作業が進められたことでしょう。

組紐は一間組です。幡頭の三角形の部分は山道柄ですが、山道は直線ではなく、緩やかなカーブを描いています。1992年発行の「日本の美術1 No.308 組紐」の解説で、当時の道明社長の山岡一晴氏は、「高台ではあのカーブはできません」と述べておられます。私がクテを使って組んだ一間組もよく似たカーブを描いています。


当時はどんな道具を使ってどんな工房でどんな職人がどんなことを思ってこれらの組紐を組んだのでしょうか。

It is autumn, a season of exhibitions.  In Nara, Shosoin Exhibition is held every year.  Last year I went there to see the ritual banner decorated with kumihimo.  A large banner, 458 cm in length and 90 cm in width, was laid down in a glass case.  It did have a full-blown dignity.  I could observe the banner through the glass to my heart’s content. I would have been happier if I could have turned the banner to see the backside of it as well.  Some parts were severely damaged and were protected with white threads.  The main body of the banner was appliqued with red and blue.  So the matching kumihimo must have been in vivid colors when it was made.  The braids were braided in ikkengumi (single-unit braiding) with strongly twisted threads.  I also attended a lecture by Mr. Ken Shimizu of Nara National Museum, which I found very interesting and I am going to tell you about it.

Banners originated in ancient India, and came to Japan through China and Korean Peninsula.  They were indispensable ritual ornamental articles for Buddhist services.  Officially, Buddhism came to Japan in 552 when Seong of Baekje in Korean peninsula sent “a gilt bronze statue of Buddha, some banners and some Buddhist sutras” to the emperor in Japan. Then Emperor Kinmei was deeply moved when he saw the golden statue.  Though I knew about the  statue, sutras and some ritual articles, it was my first time to learn that the “ritual articles” in fact mean banners!  I can imagine how much Emperor Kinmei was attracted not only to the shinning statue but also to the flapping colorful banners.  Banners usually, like in festivals in Japan, flap to the wind and uplift our feelings.


The photo shows a modern banner used during the 1390th death anniversary of Prince Shotoku in Horyuji in 2011.  In fact Horyuji has a much gorgeous gilt bronze banner, whose replica can be seen at the Horyuji Treasure Museum in Ueno, Tokyo.

According to Mr. Shimizu, the banner in Shosoin was used during the first death anniversary of Emperor Shomu on May 2, 757 in Todaiji.  This memorial service was attended by 1500 priests and was an outstanding big Buddhist event.  There were at least 10 banners like this, and over 600 dojobans which were smaller than this one.  Though the remain of this existent large banner is only a little over 4 meters long, the original banner was over 15 meters long including banner legs.  So we can imagine what a sight to see it was with 10 banners standing in a row. 

What is more, the service of the first death anniversary was held not only in the capital of Nara, but also in National Buddhist temples in 26 local counties.  In order to highlight the memorial service, the government at that time ordered the 26 counties on June 3rd in the previous year to build a 4.85-meter tall Buddhist statue if they had not built one yet.  On December 20th that year, a set of one large banner and 29 dojobans were sent to each National Temples.  The preparation for the memorial service was carried out surely and steadily both in the capital and in local counties.  The memorial service must have been a really spectacular event.

Craft people must have worked hard for the banners.  They had to finish 26 banners for the counties by December and over 10 by June 2 the following year.  They gathered expensive materials like brocades and twills, carefully selected colors and broke into teams to get on with the jobs. 

The braids are “Ikkengumi (single-unit braiding)”.  The top triangular part is decorated with mountain-path pattern kumihimo, but the path is slightly curved instead of straight.  In “Arts in Japan, No. 308 Kumihimo” published in 1992, Mr. Kazuharu Yamaoka, then President of Domyo Kumihimo Company, said “this curve cannot be made with Takadai.”  The photo below is a ikkengumi I braided with kute.  It shows similar curves.


I wonder what kind of people braided these banner braids using what kind of tools in what kind of places thinking about what?

2017年10月9日月曜日

二連角組その2 Double Kakugumi AADD Part 2

今日はまず、私のネタ本を紹介します。木下雅子著クテ打組紐技法研究会編纂発行の「クテ打組紐技法入門」およびその続編計3冊です。おそらく大きな図書館にあると思いますので、探してみて下さい。CDも付いています。表紙のカラー写真がとてもきれいです。分かりやすい文章と図解で丁寧に説明してあります。
さて、その中から二連角組を組んでみました。


緑と薄い黄色の単色ループ14本を使った2色組です

①①②②②②①    ①①②②②②①
         左手     右手  
 
これを変形したのがその下の2本です。
赤系   ④④①①①①② ④④③③③③②
               左手     右手 

紫系      ⑦①①②②③③  ⑦⑥⑥⑤⑤④④
                                     左手     右手


暈繝です。このまま帯締めにもできそうですね。ポシェットの紐などにも使えます。


次に、「クテ打組紐技法」からもう2つです。一番上は、緑とベージュの単色ループ14本を使った2色組です。緑が縁取りになっています。     
      ②①②①②①②  ①②①②①②①
                                    左手     右手

続いては、2色ループを使いますので、少し複雑です。矢羽が2列並びます。    
                    
①②①②①②①  ①①①①①①①
                     ②①②①②①②     ②②②②②②② 
         左手     右手

この組方の裏を見て3番目のパターンを考えました。2色ループを2種類14本使います。配色を変えていろいろ楽しめます。写真では、①緑、②肌色、③ベージュ、④茶を使いました。

                       ①②①②①②①  ②①②①②①②
                       ③④③④③④③  ④③④③④③④
                                        左手       右手


以上は、あくまで左手から操作を始めることを前提にしています。どうしても右から始めたい人は、配色図の鏡像を使ってください。
配色図は、色別に①②③のように数字で表しています。最初はカラーでのように表記していたのですが、色数が増えると判別しにくくなるのと、白黒の方が自由に配色を考えやすいと思って、今のようにしました。


Today I would like to introduce my material books.  It is “Introduction to Kute-uchi Kumihimo Technique” written by Masako Kinoshita and published by Kute-uchi Kumihimo Technique Research Group.  It is a three-volume series with beautiful color covers and a CD.  Perhaps you can find it in major libraries in every prefecture in Japan.  It is in Japanese.  The books explain in plain Japanese and clear graphics.


From the books, I tried Double Kakugumi, which uses 14 single-color loops in two colors (green and yellow).  
      ①①②②②②①     ①①②②②②①
         Left       Right  

 
I modified this and made two more braids.

Reddish one ④④①①①①②  ④④③③③③②
       Left        Right 


Purplish one ⑦①①②②③③  ⑦⑥⑥⑤⑤④④
       Left        Right  


These are Ungen.  How about making a string for a pochette?


Two more braids from the books.  The top one is made with 14 single-color loops in green and beige.  The green color edges the braid.
     ①②①②①②①  ②①②①②①②
        Left       Right 

  
The second one is made with 14 bi-color loops, which is more complicated. It makes two rows of chevrons. 

     ①②①②①②①  ①①①①①①①
     ②①②①②①②     ②②②②②②② 
                Left        Right  

When I saw the back side of the second one, I got an idea for the third one.  It is made with 14 bi-color loops in four colors.  You can enjoy various color combinations.  The one in the photo is made with ①green, ②flesh color, ③beige, and ④brown.

   ①②①②①②①   ②①②①②①②
   ③④③④③④③   ④③④③④③④
    Left           Right  


All the instructions are based on the assumption that you start with your left hand.  If you want to start with the right hand, please use the mirror image of the charts. I use ①②③ for different colors.  I initially used color charts like , but I have changed it because colors get confusing when I have more than 3 colors.  Besides, black-and-white charts, I thought, will allow you to make your own color combinations more freely.


2017年9月6日水曜日

二連角組 Double Kakugumi or AADD


外回し開、外回し開、中通し閉、中通し閉 (すなわちAADD)を繰り返すと、角組を横に2つ並べたような厚みのある紐ができます。二連角組、あるいは御岳組と呼ばれているそうです。私の好きな組み方です。厚みのあるベルトにしたりします。

模様の出方が面白いので、いろいろと試したくなる組み方でもあります。写真はすべて単色ループの組み合わせですが、2色ループはもっと楽しいです。
 
上の2本は、ほぼ右手と左手を変えただけです。私はいつも左手のループから操作すると決めているので、初期設定をこのように変えて、違うパターンを出していますが、同じ初期設定でも右手から始めると、この2種類のパターンができます。多色ループで暈繝(グラデーション)にしたい時は、初期設定の順番が大事です。下の2本は14本で組んでいます。番号で表すと下のようになります。


②●③●④●⑤  ●①●●●●●

ところで、「暈繝」という言葉も、「正倉院の組紐」という本で初めて知りました。なんと天平の香りのする言葉ではありませんか。

念のため、ビデオもご参照ください。


訂正します。

写真中の配色図が誤っているとのご指摘を受けました。
失礼いたしました。正しい配色図をお知らせします。
  ●●●●●●  あるいは、
②⑥③⑥④⑥⑤  ⑥①⑥⑥⑥⑥⑥


When you repeat:

Out & open, Out & open, In & cross, and In & cross,
in other words AADD,


you can get a thick braid like two-connected-Kakugumi.  It is called "Niren Kakugumi (double-Kakugumi) or Ontake-gumi.  It is one of my favorites and I make belts with this braiding technique.  I like how each color appears and makes patterns.  All the braids in the photo are braided with single-color loops.  If you have bi-color loops, you can enjoy even more.


The top two braids are done with almost the same initial color arrangement only in opposite hands.  Because I make it a rule to always start with left hand loops, the initial color arrangements are different, but if you start with right hand and left hand with the same color arrangement, you can get two different patterns.  When you want to make a Ungen (gradation) braid with many different colors, you have to be careful about the color order.  Below I show a case of 14 loops.


②●③●④●⑤  ●①●●●●●

I learned the word “Ungen” for the first time when I read the book called “Kumihimo in Shosoin”.  What a graceful word!  That brings me the 8th century atmosphere.  Please watch the video to make sure you know how to do AADD. 


Correction:
One of the readers contacted me saying that the color arrangements are not correct.  It was my mistake.  Hire is the correct one.
  ●●●●●●  or
②⑥③⑥④⑥⑤  ⑥①⑥⑥⑥⑥⑥

2017年9月2日土曜日

バッグ用持ち手真田紐 Sanadahimo for bag handles


プレゼント用のバッグを作りました。本体はヤフオクで買った2種類のワイン色の帯地です。かっちりとできあがりました。持ち手はコットンキングで組んだ真田紐です。経糸42本で組んだのですが、もう少し幅が欲しかったです。長さも85%に縮みました。データを蓄積して、思う通りの幅と長さに仕上げられるようになりたいと思います。

真田紐の裏に、底に使った帯地(母のバッグの残り)を当てています。これは持ち手の幅を出したかったのと、手に持った時に絹の帯地の方が手触りが良いだろうと思ったからです。帯地はバッグにとても良い素材だと思います。時々ヤフオクを見てクリックしています。


A bag for my friend as a present.  The body is made with 2 different wine-colour obi-sashes I got through Yahoo Auction.  I am satisfied with the structured body.  The handles are Sanadahimo I braided with 42 Cotton King warps, which turned out to be narrower than I had expected.  The length also shrunk by 15%.  I am going to accumulate the data so that I can make Sanadahimo as wide and long as I plan. 

On the back of the Sanadahimo handles I attached the sash material I used for the bottom part (left-over from my mother’s bag) .  That is because I wanted to widen the handles and also I thought the silk material would make the handles feel softer.   Obi-sash for kimono is an excellent material for bags.  I sometimes visit Yahoo Auction and click.

2017年8月22日火曜日

足糸 Foot Thread

幅の広い紐を組むためにクテの数を増やしていくと、クテの並ぶ順番が入れ替わったりして、どれが次に組むクテなのかわからなくなってしまいます。糸の色が違うと問題はないのですが、同色の糸が並ぶと混乱してしまいます。この問題を解決してくれるのが、クテと組糸の間に付ける「足糸」です。


例えば法隆寺の幡垂飾を組んだときは、赤糸が4本並んでいました。そこで、赤糸にはブルーの濃淡3色と緑1色の足糸をつけました。理想的にはブルーの濃淡4色でしたかったのですが、あるものを利用するので、贅沢は言えません。緑そして濃いブルーから順番に組めば正しい順になるようにしました。

足糸の利点は、このように色を変えてクテの順番を間違えないようにすることの他にあと2つはあります。2つ目は、糸のよじれを足糸が吸収してくれることです。長い紐の場合、同じ方向に糸を回転させる作業が続くと、糸にギシギシとヨリがかかってしまいます。そのヨリを足糸が吸収してくれるので、組む糸はゆったりと伸びやかな状態を維持できます。足糸にする糸は、ヨリを吸収しやすいように、刺繍糸のように細い糸をよらずにまとめたものが適当です。

足糸のつけ方をビデオでお見せします。足糸を「ひばり結び」という方法で糸につないでいます。玉結び1つでつながっているなんて、不思議です。


足糸の3つ目の利点は、糸の長さ調整が簡単な点です。組んでいる間に、糸の長さに差が出てくることがあります。糸の種類が異なる場合(特に金糸や銀糸)や、組み方によっては、左右に大きく移動する糸と、あまり移動しない糸がある場合などです。そんな時、ひばり結びでつないであると、長すぎる糸を引っ張って新しい玉結びを作るだけなので、結び目を解く必要もなく簡単に長さを調節できます。

何にでもデメリットもあります。足糸の場合は、当然のことながら、扱う糸の長さが長くなってしまうことです。ですから、足糸の長さは、10cm位が適当でしょう。

The more you increase the number of Kute to braid a wider braid, the more difficult it becomes to handle them.  It is even harder when you have the same color threads next to each other.  To solve this problem, we attach “foot thread” between Kute and thread. 


For example, when I made Horyuji Bansuishoku, I had 4 red threads in a row.  So I attached 3 foot threads of different tones of blue and a green.  Ideally it should be 4 different tones of the same color, but I only had 3 tones of blue and I added a green.

Other than differentiating the same color threads, foot thread has at least two more merits.  The second merit is that foot thread absorbs the twists of threads.  When you braid a long braid, twisting threads to the same direction, the threads become strongly tight.  The foot thread absorbs the twist and the threads can be kept nice and relaxed.  Foot thread should be made, therefore, with a bunch of fine threads like embroidery floss.

The video shows how to attach foot thread using what is called “Lark’s Knot” in Japanese.  It is amazing that a single knot can keep a long thread and foot thread together so firmly.

The third merit is the easy length adjustment.  While you braid, you sometimes notice that some threads are longer than others.  It happens when you have different kinds of threads (especially metallic threads) or when some threads move longer distance than others.  To make a longer thread shorter, you only have to pull the thread and make another knot.  In this way, you can adjust the length of threads without unknoting anything.

Like anything else, foot thread has a demerit.  It naturally makes the threads longer, making it harder to braid.  Therefore, the length of foot thread should be around 10cm.

2017年8月9日水曜日

2色ループで組む  Braiding with bi-color loops


写真の紐はどれも2色ループで組みました。2色ループとは、ひとつのクテの両端に異なった色の糸をつけたものです。面白い結果が出ますから、是非いろいろと試してみてください。


上の茶系の紐の最初の色配置はこのようになります。


●●●●  ②②①①

③③④④  ●●●●

左手    右手


ビデオの最初の部分では、同じ配色の2色ループが2本ずつできます。この方法では奇数の2色ループはできません。奇数の場合は、ビデオの終わりの方でお見せしているように、私は細い糸(生川商店のコットンクイーン)を2本取りで使っています。刺繍糸だと、好みの太さに調整しやすいですね。 この方法だと、2色ループが偶数でも奇数でもできます。

A bi-color loop is a loop with a different color thread on each end of Kute.  We can make unexpected patterns with bi-color loops.  Please try with different color combinations.

Below is the initial color setting for the brown braid. 

●●●●  ②②①①

③③④④  ●●●●

Left hand   Right hand


The first part of the video shows how to set even-numbered bi-color loops.

However, this method does not work with odd-numbered loops. 


When I work with odd-numbered bi-color loops, as I show toward the end of the video, I use finer threads and double them.   The embroidery floss is also usuful.  It is easy to adjust the thickness .  This method can be used both for even- and odd-numbered loops.

2017年7月26日水曜日

角組3 Kakugumi 3


なぜ角組で、ループ数が奇数の時はほぼ正方形の断面ができて、偶数だと台形になるのでしょう。直感的には反対ではないかと思ってしまいます。この疑問は、実際に組んでみると氷解しました。

7本ループで組む場合を考えてみます。左手に4本、右手に3本持つところから始めます。余談ですが、私は奇数のループで組む時はいつも左手に多い数のループを持つことに決めています。そして、いつも左手の左端のループから動作を始めることも決めています。これは、途中で今自分はどの操作をしているのか分からなくなった時に役立ちます。

話を元に戻します。左手人差し指で一番外側のループを持ち上げ、右手でそれを上から受け取ります。この時、移動するループは、左手に残っている3本のループを外側から越えて右手に移ります。次に右手人差し指で一番外側のループを持ち上げ、左手でそれを上から受け取ります。この時も移動するループは、右手に残っている3本のループを外側から越えて左手に移ります。左右同じ数のループを越えるので、左右の側面が同じ幅になります。

偶数のループ、例えば8本ループの場合を考えてみます。左右に4本ずつループを持ちます。左手一番外側のループは、左手に残った3本のループを越えて右手に移ります。右手には5本のループがあります。今度右手一番外側のループが左手に移りますが、この時右手に残っている4本のループを越えます。左右で越えるループ数が異なるので、側面の幅も変わってきます。

組紐に限らず、手作業では、頭で考えるより、手で考えた方が分かりやすいとよく言われますが、これもその良い例だと思いました。
文鎮に角組 Kakugumi with a paperweight


Why are Kakugumi with odd-numbered loops almost square in cross-section while those with even-numbered loops are trapezoid?  My sixth sense tells me the other way round.  This question was, however, resolved almost as soon as I actually started braiding.

Take a case with 7 loops, 4 loops in the left hand and three in the right to start with.  Though this is off the subject, I make it a rule to hold more loops in the left hand than in the right hand, when I work with odd-numbered loops.  Also I always start with the left hand loop. These rules are useful when you get lost in the middle of manipulation.

Back to the track.  You raise the outermost loop in your left hand with the left index finger, and you take it with the right hand.  In the process, the moving loop goes over 3 loops remaining on the left hand and is settled in the innermost of the right hand.  Then you raise the right outermost loop with the right index finger, and receive it with the left hand.  Again, the moving loop goes over the remaining 3 loops on the right hand.  Because both outermost loops go over the same number of loops, they make equally wide sides.

Now let’s take an even-numbered loop, for example, an 8-loop case.  You hold 4 loops each on both hands.  The outermost loop on the left hand goes over the remaining 3 loops and is settled on the right hand.  Now you have 5 loops on the right hand.  Next, when the outermost loop on the right hand moves, it goes over the 4 loops remaining on the right hand.  Since each outermost loop on both hands goes over different number of loops, the width of the both sides is different.

It is often said that when you work with hands, not just Kumihimo but in any handicraft, it is easier to think with hands than with the head.  I thought this is a good example of the saying.

2017年7月24日月曜日

角組2 Kakugumi 2


角組はかっちりとして実用的で、しかも美しい組み方です。正倉院にも数多くの角組の組紐が残されています。画像が小さくて見にくいのですが、正倉院の宝物データベースにが載っています。可愛い小袋ですね。ちょっと真似して作ってみたいと思わせます。


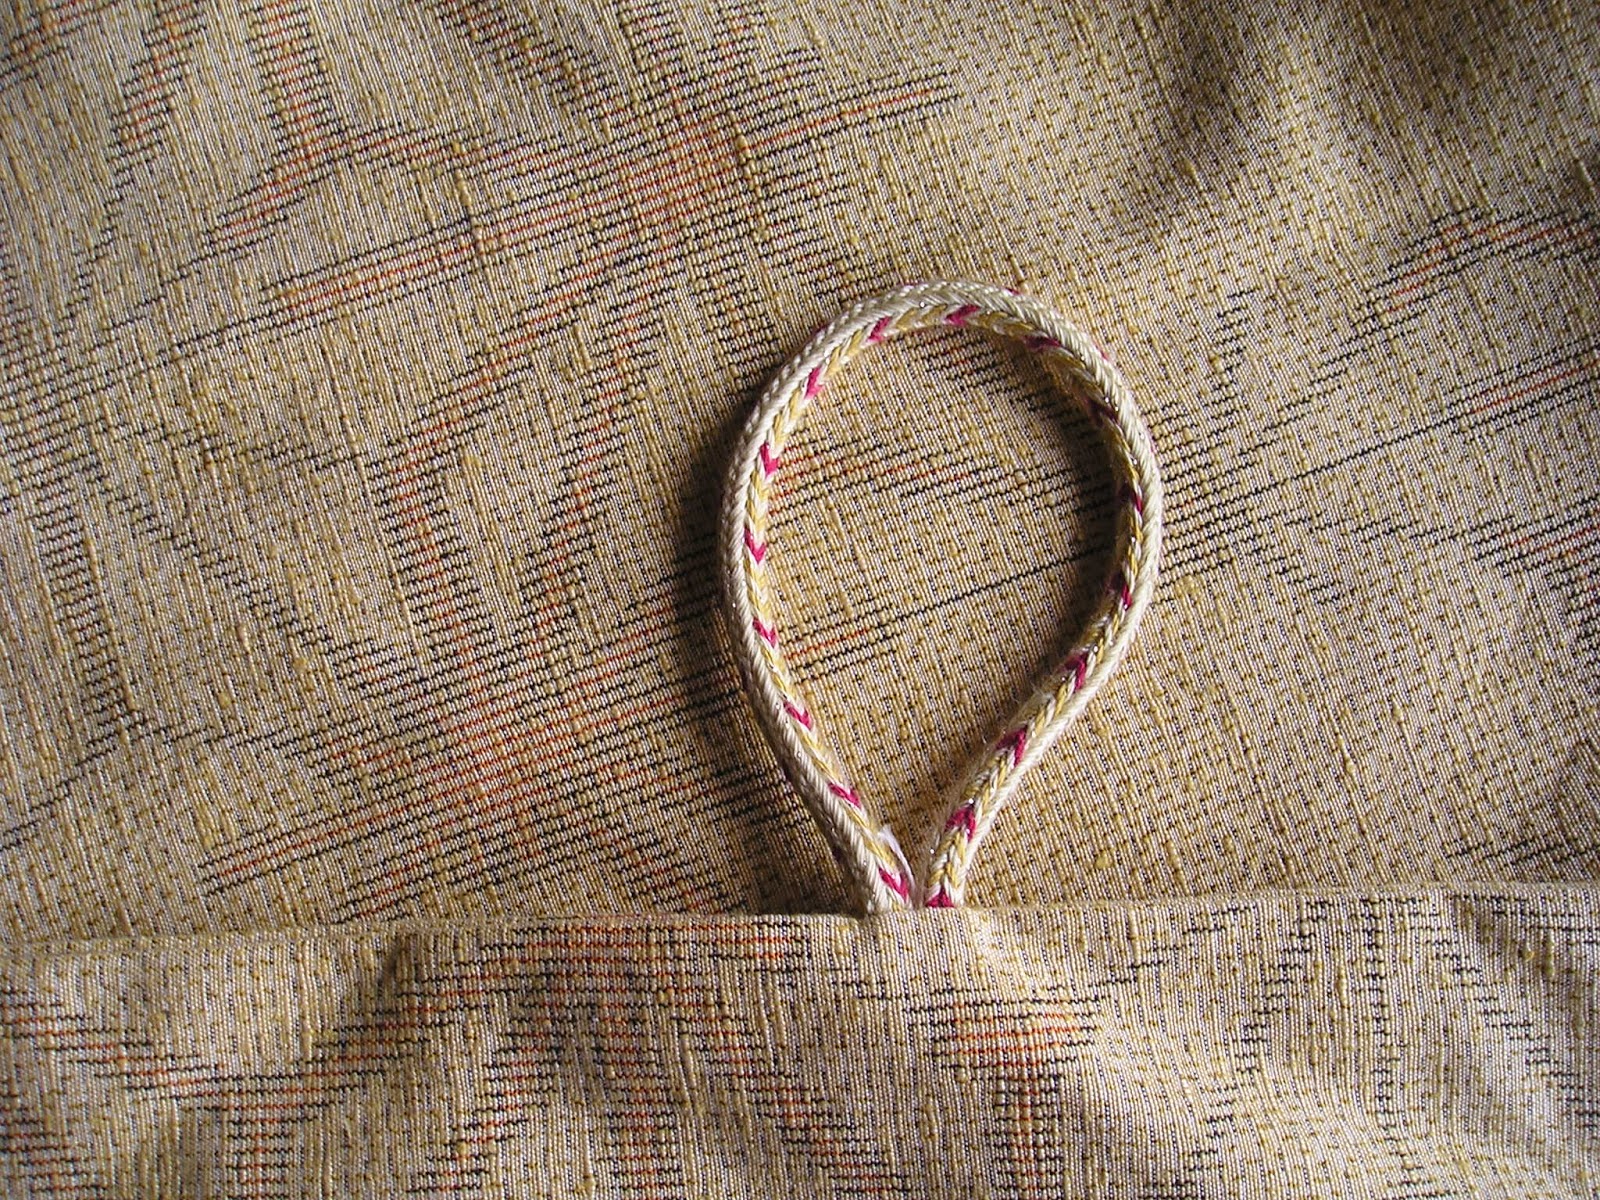
写真の上2本は、ビデオで作っていた2色の角組と同じもの、一番下の茶系のものは、これも正倉院の組紐を真似て作ったものです。これは、ループの上と下の糸が異なる2色ループで組んでいます。この作り方は近いうちに説明します。

私は台組みの経験がないのですが、台で角組を組むには4の倍数の要素数(ループの場合は1ループが2要素になる)で組むのが通常だそうです。しかし、昭和48年(1973年)に平凡社から発行された「正倉院の組紐」によると、当時調査された正倉院の240例の角組の内、要素数が4の倍数ものは78例、奇数の倍数のものは160例と圧倒的に奇数の倍数のものが多いそうです。私たちは8本のループ(要素数16)で角組を作りましたが、奇数の倍数(101418、すなわちループ数で言うと5,7,9本)で組むことももちろんできます。従って、正倉院の角組はループ組紐の手法で組まれたと、木下雅子先生は書いておられます。(正倉紀要第31)

実は、8本ループの角組の断面は台形をしています。4面の内、広い面と狭い面が向かい合っていることに気づきます。ところが、7本や9本のループで組んだ角組の方がより正方形に近い断面になります。是非比べてみてください。従って、きれいな角組を組みたければ、奇数ループで組む方が良いわけです。これも、正倉院の角組がループ組紐の手法で組まれたとする根拠の1つに木下先生は挙げておられます。さらに2つの根拠を木下先生は挙げておられますが、何しろ私は台組ができないものですから、よく理解できておりません。台組をしておられる方々は、是非この論文を読んでみてください。

深く理解できないながら、ループ組紐が奈良時代あるいはそれ以前の昔から用いられた手法であり、この手法で組まれたものを、今も私たちは、ガラス越しではあるものの、見ることができるということに、私はロマンを感じます。そして、自分が今動かしている手の動きは、古代の組紐製作者らと同じだと思うと、何だか、時代を超えた仲間意識すら感じてしまいます。 

さらに、角組は世界中で組まれてきたそうです。話は大きくなるので、今日はここまでといたしましょう。

Kakugumi is not only a strong and practical braid, but also it is beautiful.  In Shosoin (the ancient treasure warehouse attached to Todaiji (Great Buddha) Temple in Nara which dates back to the 8th century), a number of Kakugumi Kumihimo are preserved.  One of them, though not very clear, is a small incense bag  which we can see from the Shosoin Database.  A lovely small bag that makes me feel like sewing and braiding a similar one myself.


The two top ones in the photo are the same Kakugumi that I made in the video, and the bottom one I made copying another treasure Kakugumi from Shosoin.  I will explain how to make it in the near future.

I do not have an experience of braiding with Marudai, but I read that in order to braid Kakugumi with Marudai, you usually use multiples of 4 elements (in case of loop braid, one loop has two elements) .  However, according to the book “Braids in the Shoso-in” published in 1973 by Heibosha, among the 240 Kakugumi braids in Shosoin that they had examined, there were 78 braids with multiples of 4 elements whereas 160 braids were made with multiples of odd-number elements, overwhelming majority! 

Though we have practiced an 8-loop Kakugumi, we can easily make a Kakugumi with multiples of odd-number elements (10, 14, and 18, which are 5, 7, and 9 loops). Based on this fact, Masako Kinoshita Sensei writes in her paper submitted to Shosoin that Kakugumi restored in Shosoin were made using loop braiding techniques.  I am afraid I could not find the English translation of the paper.

In fact, if you look at an 8-loop Kakugumi carefully, you will notice that it is trapezoid in cross-section. It has a wide and narrow sides facing each other.  On the other hand, the braids with 7 or 9 loops are more square in cross-section.  Please compare your Kakugumi.  Therefore, if you want to make a fair square Kakugumi, you would choose odd-number loop Kakugumi.  This is another reason why Kinoshita-sensei believes that Shosoin Kumihimo are made using loop braiding technique.  She also shows two more reasons to support her idea.  But unfortunately because of my lack of Marudai experience, I do not quite understand her points.  I recommend that those who can braid with Marudai should read her paper.

In spite of the fact that I do not fully understand her logics, I am still fascinated that loop braiding is a very old technique going back over 1300 years, and the resulting works we can still watch today, though through glass, at the Nara National Museum.  Besides, when I think that the movements of my braiding fingers are the same as those of the ancient braiders, I even feel some kind of comradeship with those unseen craftsmen and craftswomen.

I also heard that Kakugumi has been braided for a long time all over the world, but the story is long and I would like to call it a day now.